Modern Workplace Mastery – Day 1: Creating the CalderCloud Microsoft 365 Tenant
Turning a Day 0 workshop into a real tenant without creating another accidental free trial.
CalderCloud Co has a clear Tenant Foundations Charter and a shared understanding of why its Microsoft 365 tenant exists. What it doesn’t have yet is a tenant.
In this post, we follow a single person who will actually click “Sign up” – deciding who that should be, which email address they must use, how the founder account will be treated long-term, and every step of the Microsoft 365 Business sign-up process until we can safely log into a brand-new admin centre.
You don’t need to be a deep technical expert to follow the process, but you do need the authority to create or replace a tenant and to own what happens next.
If your tenant already exists and feels messy, you can still use this post as a checklist for planning a clean replacement or a “Day 0” reset.
Table of Contents
TL;DR – Modern Workplace Mastery: Creating a Microsoft 365 Tenant: Signing-Up
A step-by-step guide to building your first Microsoft 365 Business tenant safely and sanely
CalderCloud is a completely fictitious organisation – much like Microsoft’s Contoso – but its pressures are very real: messy tools, data leaks, productivity black holes and people quietly burning out. It’s our safe test bed for showing how a global company can hit reset and build a Microsoft-first modern workplace properly, in the open.
In the following slides, you’ll see:
CalderCloud has a Tenant Foundations Charter, a clear owner and a chosen Microsoft 365 Business Premium plan, but no tenant yet!
This post walks through the real Microsoft 365 Business sign-up process – screen by screen: choosing the right plan, creating the founder account, setting up MFA, adding a break-glass Global Admin, and capturing the tenant’s identity so it isn’t trapped in one person’s head.
- You start with a Tenant Foundations Charter, not a random click on “Try for free”.
- The person who signs up becomes the founder: first account, initial Global Admin, and billing contact.
- You navigate the business Microsoft 365 sign-up flow (not the consumer plans), configure the subscription, and create tenantfounder@<prefix>.onmicrosoft.com with MFA from day one.
- You record key tenant facts – tenant name, country/region, data location, Tenant ID and initial .onmicrosoft.com domain – in your charter pack.
- You immediately add a second Global Admin / break-glass account and decide what happens next to the founder account, so this never becomes a one-person hero setup.
- Custom domains, licences for the wider team and full security baselines are deliberately parked for later posts once the foundations are solid.
The aim is simple: you should be able to mirror this journey in your own tenant or dev environment, learning from CalderCloud’s choices without exposing any real organisation or real people, and without wading through yet another pile of shallow “how-to” snippets.
From Tenant Charter to First Sign-In
CalderCloud has done the Day 0 thinking: purpose, ownership, region, plan and non-negotiables are agreed.
This post is the bridge from workshop charter to a real Microsoft 365 tenant you can actually sign into.
The Person Who Clicks “Sign Up” Becomes the Founder
Whoever creates the tenant becomes:
• the first account in Entra ID
• the initial Global Administrator
• the first billing / subscription contact
We choose this person deliberately, not “whoever has the card”.
Use the Business Flow, NOT Consumer “Premium”
I walk the founder through:
• Microsoft 365 For business → Business Premium
• subscription settings (user count, term, billing)
• adding a payment method, even on the trial
• creating tenantfounder@
setting up Microsoft Authenticator MFA
End result: a real, secure Microsoft 365 Business tenant, not a half-accidental consumer subscription.
Pin Down Who Your Tenant Actually Is
In Entra and the Microsoft 365 admin centre we record:
• tenant name, country/region and data location
• the Tenant ID (GUID)
• the initial *.onmicrosoft.com domain
All of this goes into the Tenant Foundations Charter, so it’s not just in one person’s memory.
Add a Break-Glass Admin and Park the Rest
Right after creation we:
• add a second Global Admin / break-glass account
• decide how the founder will be used short- and medium-term
• consciously delay domains, mass licensing and security baselines to later posts
Promise kept: from prepared charter to a documented, resilient, first tenant build – without burning out the person who clicked “Sign up”.
The outputs
• A real Microsoft 365 Business tenant created on purpose, using decisions from your charter - not guesswork.
• A named founder account with MFA configured, documented as a role (not a superhero), and ready for later demotion.
• A clear decision on at least one additional Global Admin / break-glass account - created now or explicitly written down as an urgent follow-up.
• Your Tenant Charter updated with key facts: tenant name, region, data location, primary domain, order / subscription details and current technical contact.
From here on, every post assumes this tenant and founder setup exist.
Your next step
Decide whether this tenant is your production environment or a long-lived dev / pilot tenant.
Gather your real-world domain options: existing email domains, brand names, any constraints from current providers or legacy systems.
Capture any worries about naming (staff aliases, shared mailboxes, service accounts) so you can answer them deliberately.
Then move into the next post: “Domains, UPNs and Email Addresses: Naming CalderCloud for the Next Ten Years” - where we turn those decisions into a domain and naming strategy that won’t fall apart in year three.
Where we are in the CalderCloud story?
If you’re following this series in order, we’re picking up just after (Day 0) – “Before You Create a Microsoft 365 Tenant: The CalderCloud Foundations Workshop” post.
By the end of that workshop, CalderCloud had something most real organisations never quite manage before they start clicking:
- A Tenant Foundations Charter that spells out why the tenant exists, who owns it, which country/region it must live in, and what “good” looks like over the next few years.
- A set of non-negotiables around identity, devices, users and mental health: we don’t burn people out to make the diagrams look pretty.
- A clear idea of which Microsoft 365 Business plan makes sense as a starting point (for CalderCloud, that’s Business Premium), and that we’re building a serious production tenant – not a throwaway lab.
What we don’t have yet is the thing people are usually too quick to create:
“an actual Microsoft 365 tenant.”
This post covers that missing middle step: the bridge between “we’ve thought this through” and “we’ve clicked the big sign-up buttons”.
Who this post is really for
The main audience here is the person who is about to create their first ever Microsoft 365 tenant:
- You might be the founder of a small business, a newly-promoted IT lead, or “the person who understands computers” in an organisation that’s finally moving to the cloud.
- You may never have seen the Microsoft 365 sign-up pages before, and the idea of accidentally creating the “wrong thing” is making you slightly nervous.
If you’re a seasoned admin or consultant, you’re still welcome here, but the pace is deliberately gentle and the explanations are written so that a future you can hand this post to a colleague and say, “Follow this, and don’t skip the comments in the grey boxes.”
What we’ll do in this post (and what we won’t)
In this post, we will:
- Turn CalderCloud’s Tenant charter decisions into real choices in the Microsoft 365 sign-up wizard – including region, subscription, and the all-important founder email address.
- Walk screen-by-screen through creating the CalderCloud tenant, using current Microsoft 365 Business flows and language.
- Set up the founder account with MFA so it isn’t protected by just a password.
- Create a second Global Admin / break-glass account, so the tenant isn’t a single-person hero setup from day one.
- Capture key details (tenant ID, data location, initial domain, order info) into the Tenant Foundations Charter.
We will not in this post:
- Add the real caldercloud.co.uk domain or move any email.
- Hand out licences to the entire organisation.
- Design full Conditional Access or device security baselines.
Those all get their own space in later posts. Here we stay focused on one promise:
Start with a well-prepared CalderCloud and no tenant. End with a correctly-created Microsoft 365 tenant, a sane founder story, and written evidence of what we’ve just done.
Once that’s in place, everything else we do in CalderCloud’s tenant has a solid foundation to sit on.
Assumptions & prerequisites
Before we start clicking through Microsoft’s sign-up wizard, I need to be clear about what I’m assuming both about you and about the CalderCloud world you’re following along with.
This isn’t gatekeeping; it’s about making sure you don’t discover halfway through that you’re missing something basic like a card, a phone, or the legal right to create a tenant in the first place.
What I assume about you
For this post, I’m assuming that:
- You have permission to create a Microsoft 365 tenant for your organisation (or for your own business if you’re the founder).
- You’re comfortable entering payment details on behalf of that organisation, even if you’re starting with a trial.
- You can access the internet from a reasonably modern browser (Edge, Chrome, Firefox, Safari – I use Brave – current versions).
- You have a mobile phone that can run an authenticator app for MFA (Microsoft Authenticator or similar).
If any of those are “no”, this is the moment to pause and sort them out before you start the wizard.
For the reading lanes:
- End users / founders – treat this as a guided walkthrough; don’t worry if you’ve never seen these screens before.
- IT leads / sysadmins – you’ll recognise most of this, but we’re going slowly on purpose so you can reuse it as a safe, shareable guide.
What you need ready before you start (checklist)
Here’s the short “am I ready?” list before you touch microsoft.com.
Tenant decisions (from Day 0 charter)
From the Tenant Foundations Charter:
- The organisation name you want Microsoft 365 to show (for us: CalderCloud Co).
- The country/region your tenant must live in (for data residency & legal reasons).
- Which Microsoft 365 Business plan you’re starting with (CalderCloud: Business Premium).
- Whether you’re going straight to paid or starting with a trial you intend to convert.
I’m assuming you’ve already talked about these with whoever owns risk, finance and safeguarding in your organisation – that’s what Day 0 Post was for.
Technical bits and pieces
You’ll need:
- A modern web browser and a stable internet connection.
- A mobile phone you can use during setup to configure MFA for the founder account.
- A payment card (business card if possible) for Microsoft to attach to the subscription, even if you choose “Try for free” and nothing is charged today.
The wizard will not complete without card details. I’ll call out the exact screens when we get there.
The founder and their email (high level only)
Two of the most important decisions to make in this post are:
- Who actually creates the tenant (the founder).
- Which email address they use to start the process.
Those choices:
- Create the first account in the tenant.
- Decide who becomes the initial Global Administrator.
- Tie the subscription to a specific contact identity.
Because they matter so much, we give them their own sections below:
- Section 3 – choosing the right person to click “Sign up”.
- Section 4 – email address rules (work vs personal, domain planning, early-career edge cases).
For now, all you need is:
- One work-style email address you can use during sign-up (for CalderCloud, that will be a role-based address on the caldercloud.co.uk domain).
- A clear agreement that this person is allowed to be the founder.
If you don’t yet own a custom domain and you’re a solo founder / very small business, don’t panic – I’ll explain safe options. What we won’t do is quietly build your entire company on a random Gmail account you happened to have lying around.
Production vs lab tenants
Finally, a simple reality check.
There are two sensible ways to use this post:
- Production journey – you’re creating the real tenant your organisation will live in.
- Make sure the Day 0 decisions are written down and agreed.
- Use a proper work-style email and business payment method.
- Learning journey – you’re following along in a separate test/dev tenant to understand the flow safely.
- Treat that tenant as disposable.
- Don’t mix it up with anything carrying real production data.
CalderCloud itself is a fictional-but-serious production tenant: I behave as if it’s real, with real risk and fictitious real people behind it. That’s the mindset I’m modelling here – Think Microsoft Contosa.
Once those assumptions are true for you, you’re ready for the next part of the story: deciding who clicks the button and which email they use when they do.
Choosing the right person to create the tenant
Before we touch the Microsoft 365 sign-up pages, we need to decide who is actually going to create the CalderCloud tenant.
This sounds like a boring admin question. It isn’t. The person who clicks Sign up becomes:
- the first account in the new Entra ID organisation (Tenant)
- the initial Global Administrator for the tenant
- the first billing / subscription contact
So this isn’t “whoever happens to be free at their desk”. It’s a design decision.
What actually happens when someone signs up
When you sign up for Microsoft 365 for business as an organisation, Microsoft quietly does four things at once:
- Creates a new tenant (your organisation in the cloud).
- Creates the first user account in Entra ID for that tenant.
- Assigns that account the Global Administrator role by default.
- Ties the first subscription and order details to that identity.
That account is what I call the “founder“.
Later on we can:
- add more Global Admins
- create break-glass admin accounts
- demote or repurpose the founder account
…but the fact that this person was first will always be visible in logs, billing history and audit trails. So we choose deliberately.
What makes a good “founder”
For CalderCloud, the founder is not just “the techie” or “the person with the credit card”. They need to tick a few boxes:
- Trusted and staying
- A permanent member of the organisation, not a temp, contractor or student who might vanish in six months.
- Inside the governance model
- Someone who fits into the RACI and Tenant Charter decisions from Day 0 – typically in or close to the Modern Workplace / IT leadership space, not a random volunteer from another department.
- Understands the responsibility
- They don’t have to be the only admin forever, but they do need to understand that:
- their account will start life as a high-privilege identity
- their name and account will appear in audit logs and legal evidence if things go wrong later
- They don’t have to be the only admin forever, but they do need to understand that:
- Not a secret hero
- Part of the mental health angle here is avoiding “the one wizard who knows everything”. From day one, we intend to create other admin accounts and spread responsibility, so the founder isn’t silently on-call 24×7.
If you’re following this for your own small business and you are the founder, that’s fine – you’re choosing “future you” to be the founder. The important part is that you’re entering this with your eyes open, not just because a wizard popped up and asked for an email.
What the founder will actually experience
From the founder’s point of view, the journey in this post looks like:
- Going to the official Microsoft 365 business site and choosing the right Business plan.
- Entering their work-style email address to start sign-up (I’ll define what “good” looks like for that in Section 4 below).
- Providing basic organisation details, choosing the subscription terms, and adding a payment method.
- Creating the initial sign-in for the tenant (<????>@<something>.onmicrosoft.com) and setting a strong password.
- Walking through the built-in Microsoft Authenticator setup so their account has MFA from day one.
- Landing in the Microsoft 365 admin centre as the brand-new Global Admin for your organisation name.
I’ll guide you through each of those screens in Section 5. For now, Section 3 is just about making sure the right person is the one about to take that ride.
CalderCloud’s founder decision
In the CalderCloud story, we decided that:
- The tenant will be created by a senior member of the CalderCloud Modern Workplace function who is already part of the tenant’s governance and risk discussions.
- They’re using a work-style, role-flavoured email address on the CalderCloud domain, not a personal Gmail/Outlook account and not whatever their ISP gave them in 2004.
- We accepted that:
- they will start life as Global Administrator
- they will initially be the billing contact
- they will be the first person linked to this tenant in every log
But we also committed, up front, to:
- creating at least one additional Global Admin / break-glass account as soon as the tenant exists
- designing a separate everyday user identity/account for this person, so they don’t live their whole work life using the “founder account”
- reviewing whether the founder really needs to stay Global Admin once a broader admin team and proper roles are in place
With the who nailed down, the next piece of the puzzle is how they show up to Microsoft: the email address they use to start the journey, and why consumer addresses are a trap.
Email address rules (work vs personal)
Now that we know who is going to create the tenant, we need to decide which email address they’ll use to start the Microsoft 365 sign-up.
This matters more than it looks. The address you type into that first “Enter an email address you already use” box becomes:
- the anchor identity for the founder account
- the first contact point for billing and order emails
- part of the paper trail if anything legal, financial or security-related happens later
So we treat this as a design choice, not “whatever inbox I happen to have open”.
Why Microsoft prefers work or school email accounts
Microsoft 365 Business is built around the idea of an organisation, not an individual:
- You’re creating a Microsoft organisation ecosystem, not just getting a personal mailbox.
- Licences are for users in that organisation, not for family members.
- Billing, data protection and compliance are all tied to that organisational identity.
Using a work or school email address tells Microsoft:
- which organisation this subscription belongs to
- which domain / brand the tenant is associated with
- who to contact about invoices, renewals and important changes
It also makes your life easier later when:
- the founder changes role
- someone else needs to take over the admin/billing responsibilities
- auditors or lawyers want to know who is actually behind the tenant
Trying to use a personal address (like @gmail.com, @outlook.com, @hotmail.com, @yahoo.com) tends to cause three problems:
- You may get pushed into the wrong sign-up process (consumer rather than business).
- The address doesn’t clearly belong to the organisation.
- You’ve just tied a business-critical tenant to one person’s private inbox.
So for a organisations production (or development) tenant, the default is simple:
“work or school email only.”
Patterns that age well
Good sign-up addresses share three traits:
- They clearly belong to the organisation.
- They are easy to hand over if someone leaves.
- They still look sane in an audit log in 5–10 years.
Solid patterns include (examples only):
- Role-based:
- tenantfounder@yourcompany.co.uk
- cloud-admin@yourcompany.co.uk
- mw-architect@yourcompany.co.uk
- Function-based:
- it@yourcompany.co.uk
- ops@yourcompany.co.uk
Personal-looking addresses like chris1985@yourcompany.co.uk are less ideal, but still far better than chris1985@gmail.com. If you already have a named address you’re committed to, it’s not the end of the world – just document it and plan a future handover route.
“I only have personal email” – small business & early-start-up cases
If you’re following this as a:
- solo founder
- tiny start-up
- early-career freelancer
…you might only have:
- a personal Gmail / Outlook.com address
- a college or school email that will expire
- no custom domain yet
For a real production tenant, the safest sequence is:
- Register a domain for your business (for example, myfirstbusiness.co.uk).
- Set up a basic mailbox such as you@myfirstbusiness.co.uk with any provider.
- Use that as the sign-up address for Microsoft 365 Business.
- Later in this series, I’ll show how to move mail and DNS fully into Microsoft 365 using that domain.
For learning and experimentation, treat things differently:
- Use a separate dev / test tenant (for example via the Microsoft 365 developer program or trial offerings).
- Do not build your real organisation on a lab tenant that was created with mygamertag1984@gmail.com at midnight.
CalderCloud, in our story, already has a domain (caldercloud.co.uk) and can create appropriate work-style addresses on it – which is exactly what I want to model.
CalderCloud’s email rule
In the CalderCloud journey I formalised a simple rule:
Production tenants are created using a work-style address on a CalderCloud-owned domain. Personal consumer mailboxes are never used as the founding identity for a production tenant.
Practically, that means:
- I choose a role-based address like (example) founder@caldercloud.co.uk for sign-up.
- That address belongs to a real person, but it can be handed over if that person changes role or leaves.
- All the early emails from Microsoft (orders, “welcome”, security prompts) land in an inbox that is clearly a CalderCloud asset, not someone’s personal digital attic.
How this plays out in the wizard
When we hit the first sign-up screen that asks:
“Enter an email address you already use”
…we’ll:
- Use the CalderCloud founder work address I’ve chosen here.
- Accept that Microsoft will either:
- recognise it as an existing work/school account and try to sign in, or
- say “Looks like you need to create a new account” and step us through creating founder@caldercloud.co.uk as a new identity.
Either way, by the time we move into Section 5 (Step-by-step: creating the CalderCloud tenant), we already know two things:
- The right person is about to click the buttons.
- They’re showing up as a work-style, handover-friendly identity that belongs to CalderCloud, not to a random free webmail service.
That alignment between “who” and “how they appear to Microsoft” is what keeps the origin story of the tenant clean and makes everything we do in the rest of this series much easier to reason about.
Step-by-step: creating the CalderCloud Microsoft 365 tenant
In this section we will finally go from “prepared charter” to “real tenant”.
I’ll start on microsoft.com, avoid the consumer traps, choose Microsoft 365 Business Premium, walk through the subscription and account wizard, set up MFA for the founder, and land in the Microsoft 365 admin centre. At the end, I’ll capture key tenant details so they’re not trapped in one person’s head.
Where the UI is likely to change over time, I’ll call it out. The exact wording or location may move, but the underlying steps stay broadly the same.
Remember! it is a Step-by-step guide, no shortcomings, and fully accurate content up to and including 30th November 2025.
Step 1. Open the correct Microsoft 365 Business page (avoid the consumer trap)
In your browser, go to https://www.microsoft.com.

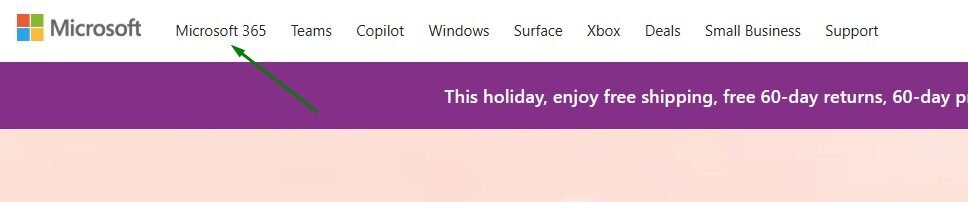
On the top menu, select Microsoft 365.
This takes you to a general Microsoft 365 page (URL similar to …/microsoft-365).

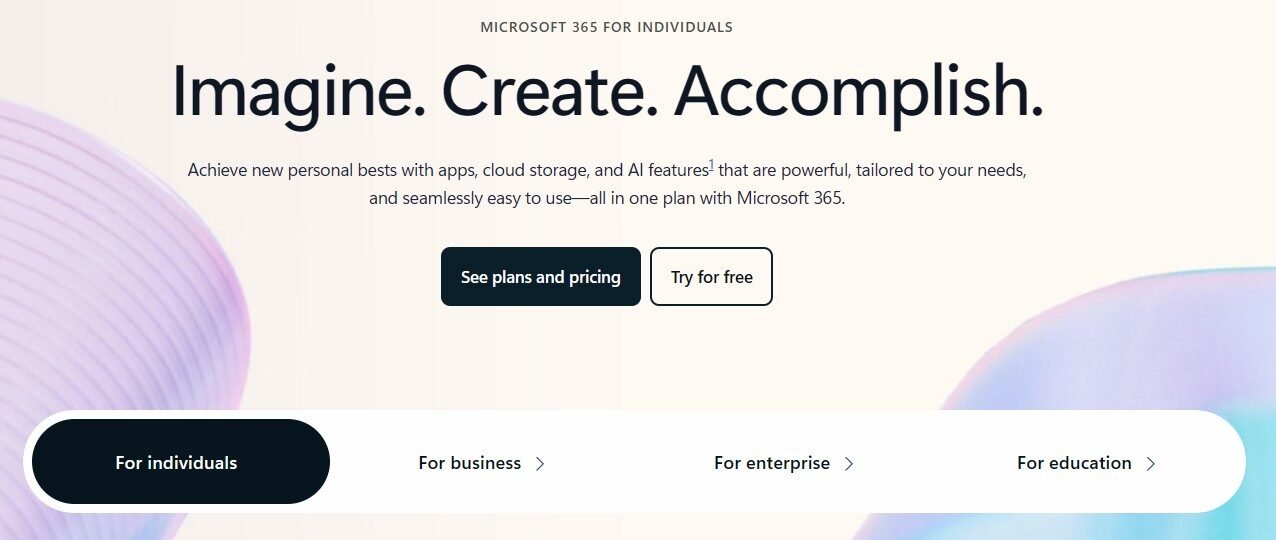
Near the middle of that page you’ll see tabs such as:
- For individuals (often selected by default)
- For business
- For enterprise
- For education
If you leave it on For individuals and click “See plans and pricing“, you’ll end up on consumer plans (Microsoft 365 Family, Microsoft 365 Personal, sometimes “Microsoft 365 Premium”).
These are NOT what we want for CalderCloud.
Click For business.
The URL will change to something like …/microsoft-365/microsoft-365-business.
Now click See plans and pricing within the For business section.
You should now see the Microsoft 365 Business plans: Business Basic, Business Standard and Business Premium.
Step 2. Choose Business Premium and configure the subscription

Find the Microsoft 365 Business Premium card.
You’ll see options like:
- Buy now
- Try for free
Both routes ultimately lead to a similar Subscription and account details screen. The key difference:
- Try for free – is a trial for one month – you configure what the paid subscription will become when the trial ends; nothing is charged today.
- Buy now – you configure and start paying immediately, with no free month.
Click either Try for free or Buy now, based on your Day 0 decision.

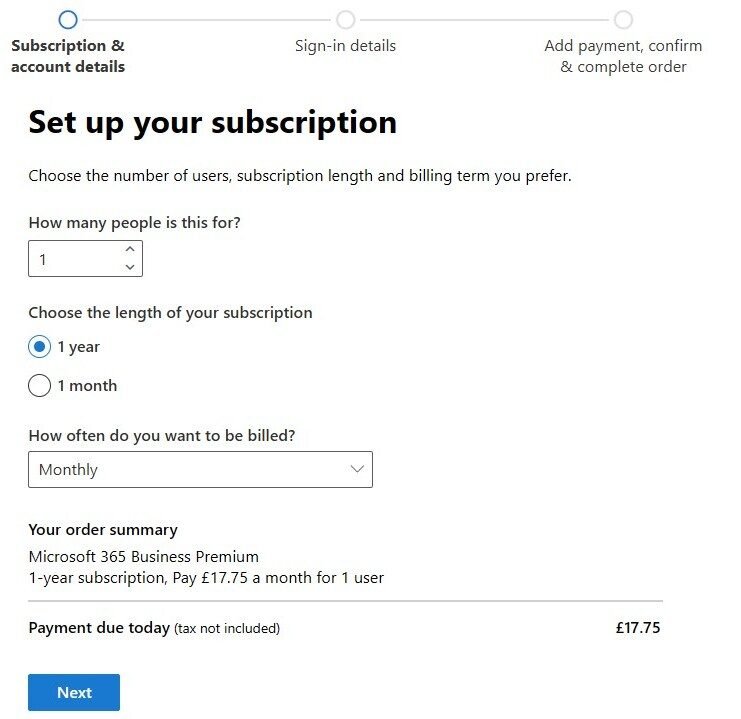
On the next page (“Subscription and account details” or similar) you’ll see controls like:
- How many people is this for? – defaults to 1.
- Choose the length of your subscription:
- 1 year
- 1 month
- How often do you want to be billed? – e.g. Monthly.
- An order summary that reads along the lines of:
- “Microsoft 365 Business Premium – 1-year subscription, pay £xx.xx user/month for 1 user. Subtotal after trial (tax not included).”

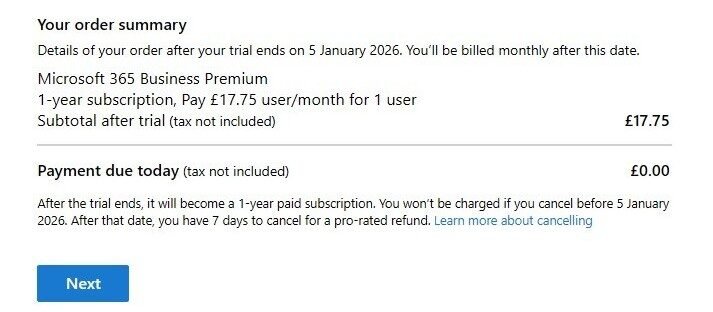
If you’re on the trial path, beneath this you’ll see text similar to:
“After the trial ends, it will become a 1-year paid subscription. You won’t be charged if you cancel before <date>. After that date, you have 7 days to cancel for a pro-rated refund.”
For CalderCloud I…
- Set How many people is this for? to 1 (just the founder).
- Choose a 1-year subscription, billed monthly.
- Use the trial path, but treat it as a serious production tenant, not a disposable lab.
Whatever you choose here is your real commitment:
- In the trial path, these settings define what things auto-convert into.
- In the Buy now path, the same settings define what you’re buying immediately (the message at the bottom is different, but the order summary line is the same).
When you’re happy:
- Double-check the order summary line.
- Click Next.
Step 3. Enter a contact email and start account setup
After selecting “Next” in the order summary page to kickstart the tenant creation process; it is important to understand Microsoft now wants an email address it can use to communicate with you about setup, billing and renewals.
Official docs call this “an email address that you already use”. What does it mean to us?

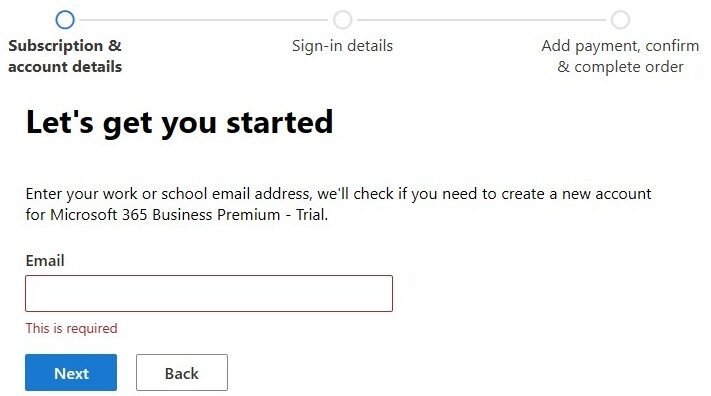
You’ll see a page along these lines:
Enter an email address you already use
We’ll use this to send you information about your subscription and bills.
- In the box, enter the founder work address you chose earlier – for example:
xx_founder@<orgname>.co.uk - Click Next.
Microsoft now checks whether this address is already a work or school account:
- If it is already associated with an organisation, you may be asked to sign in instead. That can indicate the address is already tied to another tenant – it is worth pausing and double-checking.
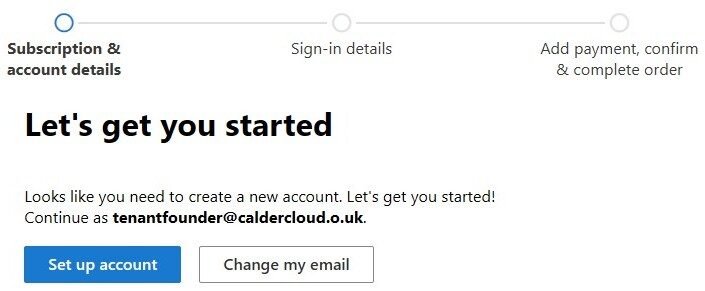
If it is not, you see a message similar to below:
“Looks like you need to create a new account. Let’s get you started!
Continue as xx_founder@<orgname>.co.uk.”
- Confirm the email shown is exactly what you want.
- If it’s wrong, click Change my email, fix it, and continue.
- When it’s correct, click Set up account.
This doesn’t yet create the tenant; it just says, “Yes, let’s use this address as the basis for a new work account.”
Step 4. Enter business details and verify you’re real
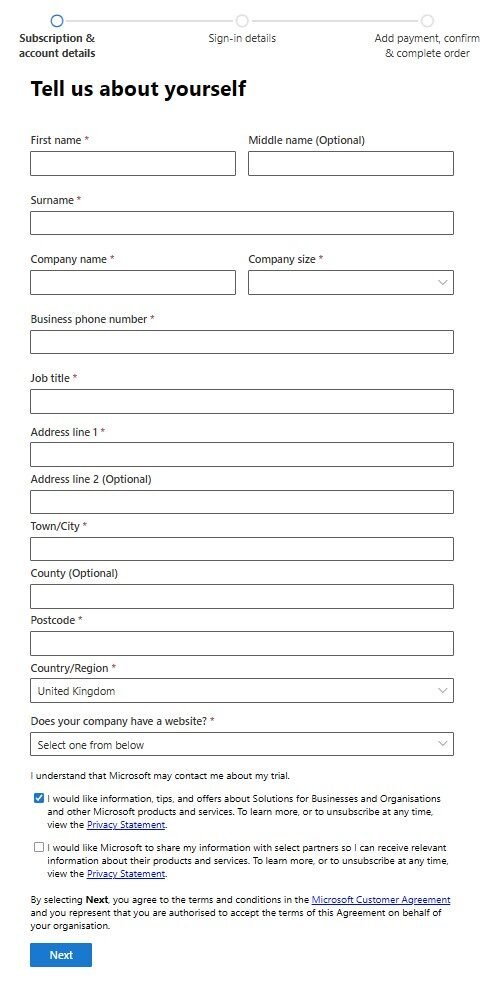
Next, you’ll see a page asking for basic organisation and contact details, similar to the steps in Microsoft’s simplified sign-up guide called “Tell us about yourself“.
Fields include:
- First name and Surname
- Business phone number
- Company name
- Business size (number of employees)
- Country/Region
- Address
- Job Role
For CalderCloud I…
- Entered the founder’s real name.
- Entered a business phone number that can receive verification codes.
- Use the full legal company name: CalderCloud Co.
- Chose the business size realistically (it mostly affects guidance and some defaults).
- For Country/Region, pick the tenant country decided in the Tenant Charter – for CalderCloud this is United Kingdom.
This country choice helps determine where your data lives and which regulations apply; it’s not something you casually change later.
Click Next (to continue)
Note! You may see a “help us make sure it’s you” step:
- Enter a mobile number.
- Click Send verification code.
- Enter the code you receive and select Verify.
Once that succeeds, you move on to defining how you’ll sign in.
Step 5. Create the tenant sign-in (founder username & .onmicrosoft.com name)
Now it’s time to choose:
- the founder’s username, and
- the initial Microsoft 365 domain (<prefix>.onmicrosoft.com)

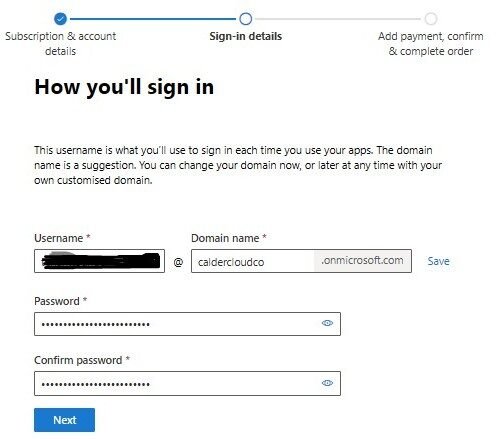
Screen titles vary (“How you’ll sign in”, “Create your business identity”), but you’ll see boxes for:
- Username – before the @ symbol.
- Domain – a field where you enter or accept a suggested prefix, and Microsoft appends .onmicrosoft.com.
For CalderCloud:
- In Username, enter a clear, role-flavoured name such as:
xx_founder - In the domain field, type a short, recognisable prefix, e.g.: I used caldercloudco
- Microsoft will show the full address as:
xx_founder@caldercloudco.onmicrosoft.com
- Microsoft will show the full address as:
- If the domain prefix is already taken globally, tweak it (for example calderclouduk, caldercloud-mwm).
- Note down:
- The username (xx_founder).
- The full onmicrosoft.com address (xx_founder@caldercloudco.onmicrosoft.com).
- The tenant domain prefix (caldercloudco).
- Set a strong password for this account, following your Day 0 security expectations.
- Move to the next step.
Important
We are not adding the real domain name here. We let Microsoft create the default *.onmicrosoft.com name now and add the custom domain later in Day 2, where I’ll handle DNS, email routing and sign-in naming properly.
Step 6. Add a payment method
After defining the sign-in details, Microsoft will ask you to add a payment method – even on the trial path.

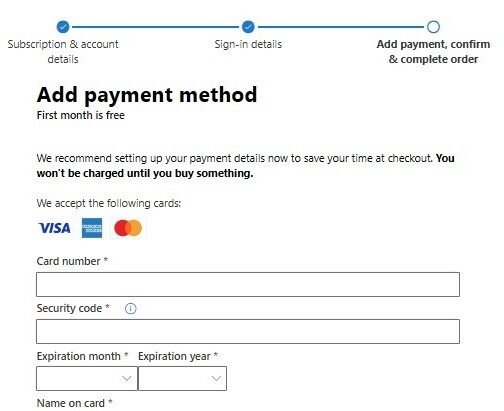
You’ll see an Add payment method page, often with a line like:
“First month is free”
“You won’t be charged until your trial ends.”
Fields typically include:
- Card number
- Expiry date
- Security code (CVV)
- Name on card
- Billing address (if not already captured)
For CalderCloud I…
- Use a business card that the finance team recognises, not a random personal debit card.
- Enter the card details carefully.
- Check the Payment due today line at the bottom:
- On the trial path, this should show £0.00.
- On Buy now, it will show the first charge based on your subscription settings.
- Click Save or Next to continue.
We also record:
- The last four digits of the card and cardholder name.
- That this card backs the Business Premium subscription.
Those notes go into the Tenant Foundations Charter so finance and IT stay joined-up.
Step 7. Add extra security: set up Microsoft Authenticator (MFA)
Once payment is accepted, Microsoft starts creating the tenant in the background and immediately moves on to securing the founder account.
You’ll see:
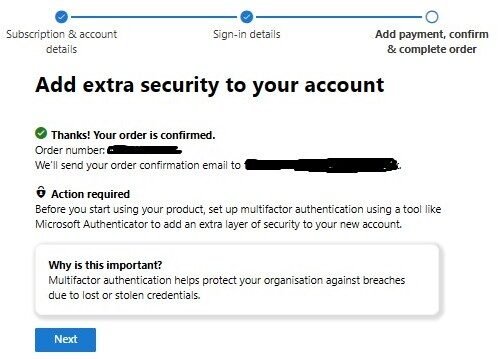
Add extra security to your account
Action required – Before you start using your product, set up multifactor authentication…
There’s really only one option: click Next.
This launches the security info wizard to set up Microsoft Authenticator for the founder.
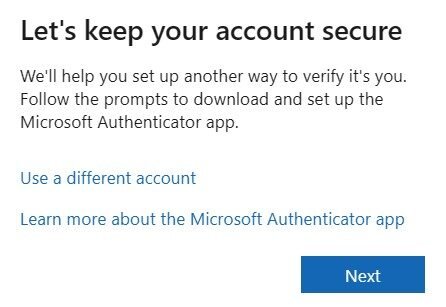
Let’s keep your account secure screen
We’ll help you set up another way to verify it’s you.
Click Next.

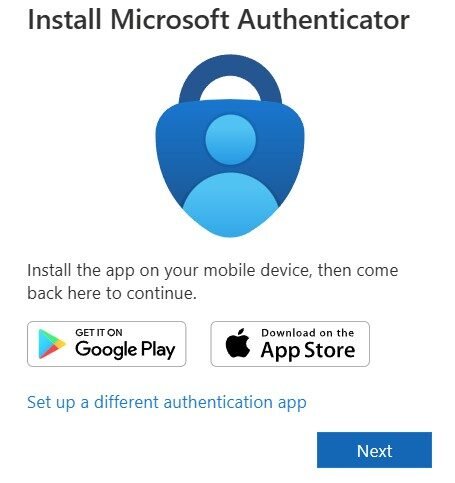
Install Microsoft Authenticator (if needed) screen:
- Get it on Google Play
- Download on the App Store
- or a link to use a different app.
On your phone:
- If you don’t already have it, install Microsoft Authenticator from the relevant store.
- Open the app.
Back in the browser, click Next.

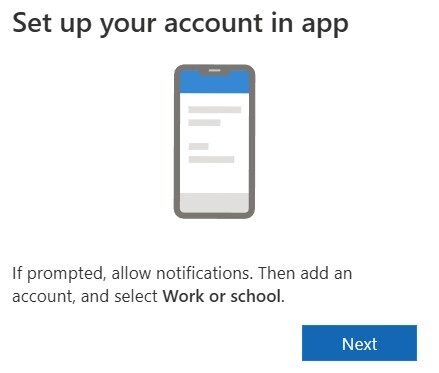
Set up the account in the app screen:
Add an account and choose Work or school account.
On your phone:
- In Microsoft Authenticator, choose Add account.
- Select Work or school account.
- When asked, choose Scan a QR code.
Then, in the browser, click Next.

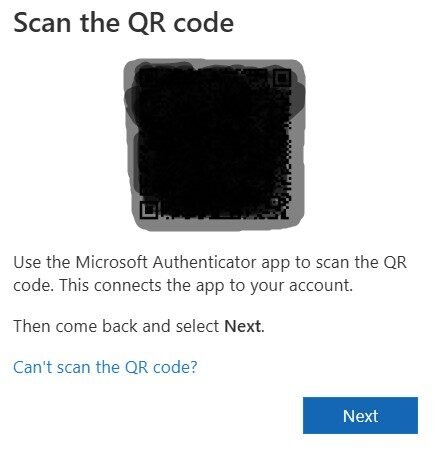
Scan the QR code and approve the test
You’ll see a QR code on-screen.
- Use Microsoft Authenticator on your phone to scan the QR code.
- The app will add a new entry for something like xx_founder@<orgname>.onmicrosoft.com.
- Click Next in the browser.
Microsoft will usually send a test notification to your phone:
- Approve the sign-in on the phone.
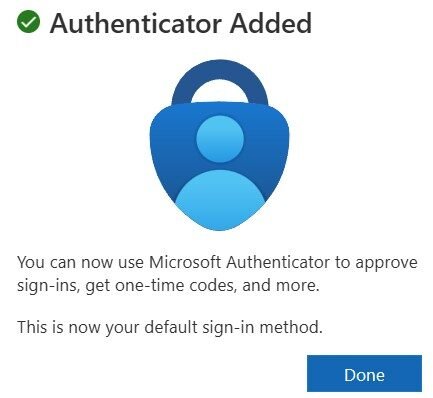
Authenticator added
You’re now set up to approve sign-ins from this account.
Click Done.
At this point:
- The order is confirmed.
- The tenant is being created.
- The founder account has MFA configured via Microsoft Authenticator.
This is much better than a Global Admin protected only by a password.
Step 8. Start using your new tenant
After MFA, you’ll see a final confirmation page, typically titled:

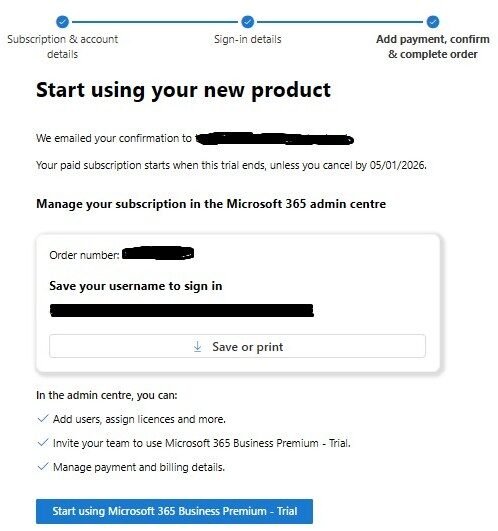
Start using your new product
It shows:
- A confirmation that your order email has been sent to the founder address.
- A reminder of when the trial ends (if applicable) and when billing begins.
- A panel with:
- Order number
- A reminder of the founder sign-in name (xx_founder@<orgname>.onmicrosoft.com)
- A link to save or print these details.
And a button along the lines of:
Start using Microsoft 365 Business Premium – Trial
Before clicking this button:
- Note the order number and trial end date in your charter.
- Confirm the founder sign-in name is exactly what you expect.
Then click Start using….
This drops you into Microsoft 365 signed in as the founder.
Step 9. First admin sign-in and capturing tenant facts
Confirm you can reach the Microsoft 365 admin centre
From the landing page:
- If you aren’t already in the admin centre, go to https://admin.microsoft.com.
- Sign in as:
- xx_founder@<yourorganisation>.onmicrosoft.com
- the password you created earlier (plus MFA approval).
You should land on one of the current home views:

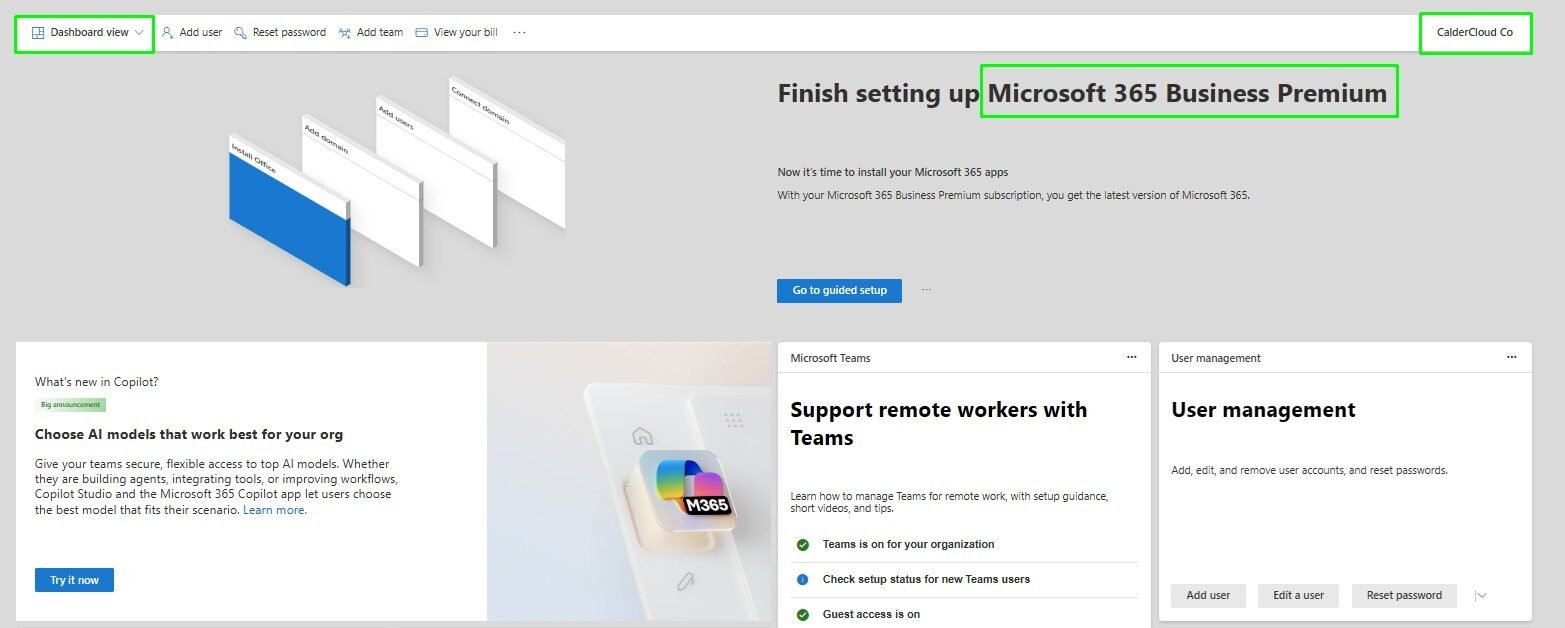
- Dashboard view (example shown) – banner like “Finish setting up Microsoft 365 Business Premium” with tiles for setup tasks.
- Simplified view – “Good morning, <name>” with a simple checklist and tabs for Users, Teams and Products.
In both cases, you’ll see:
- Organisation name: CalderCloud Co. (example)
- A view-switcher at the top (Dashboard/Simplified).
If you see this as the founder, the tenant exists and the account is a working admin.
Capture the tenant identity in Entra ID (read-only)
Now we grab the key “passport details” for the tenant from Entra ID.
- Open a new tab and go to https://entra.microsoft.com
- In the left menu, select Entra ID → Overview.
- At the top, make sure you see CalderCloud Co as the organisation.
- Select the Properties tab.
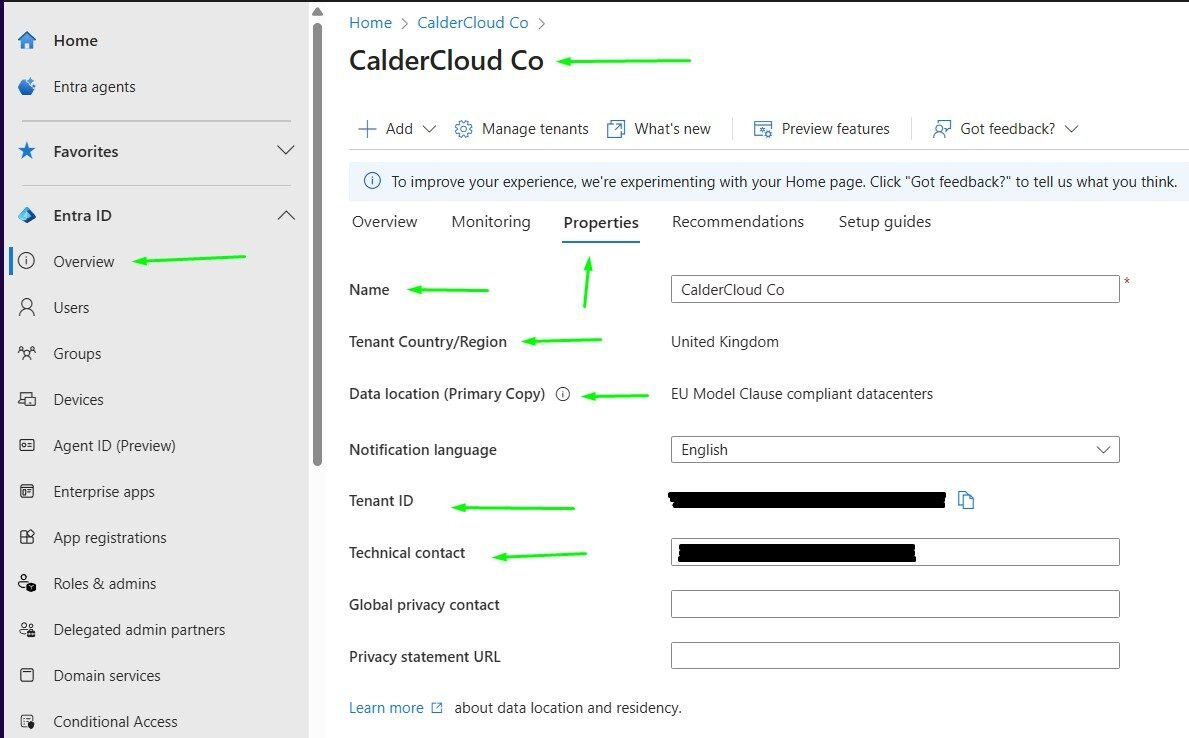
On this page, without changing anything, capture:
- Name – e.g. CalderCloud Co.
- Tenant Country/Region – United Kingdom.
- Data location (Primary copy) – for example, where primary data resides.
- Tenant ID – the GUID (use the copy icon).
- Technical contact – the email shown here (it should be the founder email address).
Add these to the Tenant Foundations Charter under “Tenant identity”.
Important
Don’t edit any fields in Entra Properties yet. We’re just reading values and writing them down. Changes to name, contact and other flags come later, once governance is properly in place.
Capture the initial .onmicrosoft.com domain
Back in the Microsoft 365 admin centre:
- Go to Settings → Domains.
- You’ll see a list including something like:
- <organisation>.onmicrosoft.com – usually marked as Initial domain.
Capture:
- The exact initial domain name.
- A note that this is the technical name chosen at sign-up and will continue to exist even after we add our own domain (example caldercloud.co.uk.)
At this point:
- The CalderCloud tenant exists and you can sign in as the founder Global Admin with MFA.
- You’ve configured the subscription, payment method and security for that first account.
- You’ve captured the tenant’s name, ID, country/region, data location and initial domain in the Tenant Foundations Charter.
That’s completes this post’s “how-do-I” section – long and detailed but accurate (for that I apologise): from “we’ve thought about it” to “we have a documented, correctly created a tenant with a secure founder”.
Immediate post-creation tasks
Right now, CalderCloud is in a deceptively fragile state:
- The tenant exists.
- The founder can sign in as a Global Admin with MFA.
- We’ve recorded the tenant’s identity (name, region, ID, initial domain, order details).
But there’s still a single person who effectively is the tenant. Before we touch anything big (domains, users, devices), let’s fix that.
Here are my suggestions on what you should consider doing now:
- Create at least one additional Global Admin “break-glass” account.
- Decide and document what happens to the founder account next.
- Deliberately park everything else for later posts.
Create a dedicated Global Admin / break-glass account
As mentioned above; we never want the situation where one person’s account is:
- their daily email
- their Teams identity
- the only Global Admin
- and the only way into the tenant in an emergency
So the first structural change we should make is to create a second, dedicated Global Admin account (personally I recommend having 2 break-glass accounts – more on this in later posts).
“a break-glass identity.”
Think of it as a fire extinguisher behind glass: rarely touched, but always there.
What this account is
For CalderCloud, the break-glass account:
- Is cloud-only (created directly in the tenant, not synced from any on-premises directory).
- Has the Global Administrator role assigned.
- Has a strong, unique password stored somewhere agreed in the Tenant Charter (for example, an enterprise password manager plus a sealed offline copy – note there are other options available that I will discuss and suggest in later posts.).
- Is not used for normal email, Teams chats or day-to-day work.
Licensing:
- A Global Admin does not need a Microsoft 365 licence just to reach the admin portals.
- You only need to license it if you expect to use apps like Outlook / Teams with that account.
- For a pure break-glass account, it’s often cleaner to leave it unlicensed.
How CalderCloud created it
Ensure you are signed in as the founder:
- In the Microsoft 365 admin centre, go to Users → Active users → Add a user.
- Create a user with:
- Display name – <unique name> that will be stored in the charter as the Break-Glass account.
- Username – something clear like xx-breakglass-p (or whatever name you prefer) using the …onmicrosoft.com domain.
- Let Microsoft generate an initial password, but after creation, sign in once as this account (I would use a private browser option) and set a new, very strong password, then store it according to your agreed password management process.
- Skip assigning a licence unless you have a specific reason to give this account apps.
Then assign the role:
- In the admin centre, go to the Roles area (or use the Entra admin portal if you prefer).
- Find the “Global Administrator” role.
- Add the new xx-breakglass-p@… account as a role member.
- Save.
Result: CalderCloud now has two Global Admins:
- The founder (founder@<orgname>.onmicrosoft.com).
- The break-glass admin (xx-breakglass-p@<orgname>.onmicrosoft.com).
We then immediately note this in the Tenant Foundations Charter:
“Break-glass Global Admin created: xx-breakglass-p@… (cloud-only, unlicensed, strong password, stored as per charter).”
We’ll come back in a later post to tighten its MFA / Conditional Access posture so it’s both usable in emergencies and not an obvious weak point.
Decide what happens to the founder account
The founder is currently:
- a Global Admin
- the billing / subscription contact
- the person whose name and account are in every “origin story” log
If we don’t intervene, this account will quietly become the default way to “just get things done” forever. That’s bad organisational architecture and security as well as bad for the person behind it.
We need to make an explicit short and medium-term decision.
Short term (first phase)
For the first few posts in the series, CalderCloud keeps things simple:
- The founder stays Global Admin, so we can complete the initial tenant setup journey.
- The founder uses their account for both admin work and day-to-day access, but:
- It is MFA-protected from day one.
- We already have the break-glass account as a safety net if the founder is locked out.
This avoids over-complicating the first 24 hours while still giving us redundancy.
Medium term (beyond Day 1)
Once the tenant has:
- additional admins
- some basic role separation
- a clearer operating rhythm
…the CalderCloud plan is:
- Create a separate, normal user account for the person behind the founder (for example, james.surname@caldercloud.co.uk).
- Use that normal account for email, Teams, documents, meetings – the day-to-day actual job of the founder.
- Reserve the founder account only for:
- high-privilege tasks
- changes to tenant-level configuration
- situations where we explicitly need “the origin account”
Later, we may also:
- remove Global Admin from the founder and keep it as a lower-privilege billing or directory admin; or
- leave it as Global Admin but treat it as a “high-friction” account that’s used rarely and very consciously.
The key is that we write this intent down in the Tenant Foundations Charter:
“Founder account remains Global Admin during Tenant Foundations setup. Break-glass admin created. Medium-term goal: founder uses a separate normal user account for day-to-day work; founder account reserved for high-privilege admin only and reviewed once broader admin roles are in place.”
That way, six months from now, we’re not arguing over folklore; we can see what we agreed on day one.
Park everything else (on purpose)
By now, the Microsoft 365 admin home is full of tiles gently shouting at you:
- “Add your domain”
- “Get your users set up”
- “Install apps”
- “Protect your organisation”
I recommend you ignore almost all of them for the moment.
Day 1 had a very tight promise, and by this point we’ve fulfilled it:
- We started with a Tenant Foundations Charter and no tenant.
- We navigated the Microsoft 365 Business sign-up process deliberately, not on autopilot.
- We created a real new tenant,
- Secured the founder with MFA,
- Added a second Global Admin for resilience, and
- Captured the tenant’s identity so it’s not locked inside one person’s memory.
Everything that follows in this journey now stands on this foundation. Without it, the series would just be a tidy “guide” on top of a shaky, accidental tenant.
And Finally!!
A healthier tenant won’t fix everything, but it can absolutely remove some of the constant background stress – if you are suffering, if the way your tools are set up is already affecting your mental health and well-being or your team’s, that is what matters. Talk to your manager, HR, or if needed your GP. In the UK, you can contact NHS 111 for advice, and in an emergency you can call 999 or contact Samaritans on 116 123 for immediate support.
Sources and last verified
This post is based on:
-
CalderCloud Co’s fictional-but-realistic story as defined in Modern Workplace Mastery
-
30+ years of working with Microsoft platforms in on-prem, hybrid and cloud environments
-
The current Microsoft 365 Business sign-up flow and admin centre experience at the time of writing (validated against a live test tenant).
-
Broad practice patterns from Microsoft 365 documentation and trusted community resources, adapted for SMEs and education-style environments.
As Microsoft 365 evolves, screens and labels will shift, but the underlying principles here – deliberate ownership, documented decisions, and security as a default – should remain solid.
What happens next in the Modern Workplace Mastery series
In the CalderCloud story, this closes Day 1:
-
The charter from Day 0 has been turned into a real tenant, created intentionally by the right person with the right safeguards.
-
We’ve captured enough baseline information that future decisions aren’t built on “I think we set it up like…” stories.
From here, Week 1 branches into the rest of the tenant foundations journey:
-
Day 2 – Domains, UPNs and Email Addresses: turning caldercloud.onmicrosoft.com into something staff actually recognise and trust, and designing naming patterns that will still make sense in ten years.
-
Day 3 – Licensing CalderCloud: turning budget envelopes into a concrete Microsoft 365 SKU mix (and avoiding licence spaghetti).
-
Day 4 – Safe by Default: moving from basic security defaults to a deliberate baseline for access and sharing.
-
Day 5 – Making It Feel Like CalderCloud: branding, help links and the first experience real users see when they sign in.
You don’t have to read them in one sitting, but this post is the hinge everything else hangs from. Get Day 1 right, and every future decision is easier to explain, document and defend.
🧭 Follow the full journey: You’re welcome to follow along quietly, Questions, disagreements and “we tried this and it hurt” stories are all part of the point. You can catch each post right here and can follow along on LinkedIn, Instagram, or Bluesky.
Thank you for joining me on this journey.
🔗 SharePointMark – Modern Workplace Mastery
#ModernWorkplace #ModernWorkplaceMastery #MentalHealthAtWork #SharePointMark

